Repotting your houseplants is an essential step for their health and growth. Follow this handy guide to know when and how to repot your plants, as well as the care needed afterwards.
When should you repot your houseplants?
Signs that it's time to repot
Houseplants show clear signs when they need repotting. Slowed growth, smaller new leaves and fewer of them, as well as a need for more frequent watering — all of these are signs that it's time to give your plant a new space to grow.
Check the roots too: if they're poking out of the drainage hole, appearing at the surface, or circling around the pot, it's time to repot.
A plant that seems unstable or tips over easily can also be a sign that it's too cramped in its current pot.
The best time to repot
Repotting is best done during the plants' growing season, which runs from spring to autumn. March and April are ideal months for repotting the majority of houseplants, such as Monsteras, Zamioculcas and Pothos. Avoid repotting between November and February, when plants are dormant, and during flowering to avoid stressing the plant.
Repotting during the active growing season allows the roots to establish quickly in the new compost, reducing the risk of shock to the plant.
How to repot your houseplants?
Preparation and what you'll need
To repot a houseplant, get yourself a terracotta or plastic pot that's slightly larger than the previous one (2 to 4 cm more for a pot under 30 cm in diameter, 5 to 10 cm more for a pot over 30 cm). Use a compost suited to your plant, whether that's for green plants, flowering plants, cacti or succulents.
Also have a garden knife or pair of scissors to hand to cut away dead or rotting roots, and make sure you have a watering can nearby to water the plant after repotting.
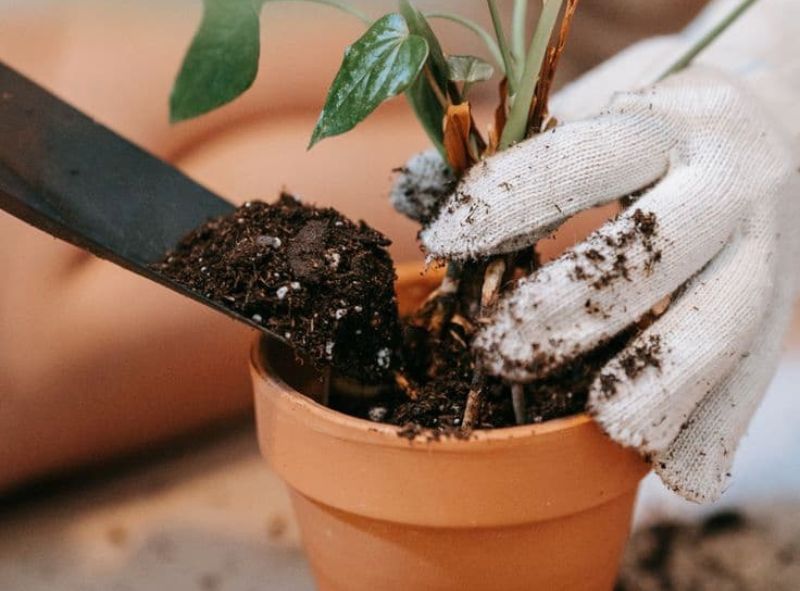
Steps for repotting
- Gently remove the plant from its current pot : To do this, hold the base of the stem and pull gently. If the plant resists, tap lightly on the sides of the pot to help loosen the root ball.
- Clean the roots : Remove soil residue by gently shaking the root ball, then cut away any dead or rotting roots using your knife or scissors. This will stimulate the growth of healthy new roots.
- Prepare the new pot : Place a layer of fresh compost at the bottom of the new pot. This layer should be deep enough so that the plant sits at the same height as in its old pot.
- Position the plant : Place the plant in the centre of the pot with the roots spread out, then add compost around the root ball to 2 to 5 cm below the rim of the pot. Make sure the plant is straight and stable.
- Gently firm down the compost : To remove air pockets and ensure good contact between the roots and the compost, gently press the compost around the plant. This will also help keep the plant in place.
- Water generously : After repotting, water the plant generously to help settle the compost and provide the moisture the roots need. Make sure the water drains well through the drainage hole to avoid water pooling at the bottom of the pot.
- For strong roots after repotting, you can use willow water, diluted in your watering water (2 full pipettes per 100 ml of water). Willow water stimulates root development — and this is the perfect moment to give your plants that extra boost.
Care after repotting
After repotting, it's crucial to keep an eye on your plant to make sure it's settling well into its new environment. Keep it out of direct light for a few days to let it recover.
Water moderately during the first few weeks. Avoid overwatering, as freshly trimmed roots are more sensitive and can die off more easily.
Repotting our houseplants is essential for their health and growth. By choosing the right moment and following the right steps, you'll have plants in full health, with beautiful strong roots!
Every plant has specific needs, so adapt your care to suit each one. 🌿
💌For more tips, you can drop us a message on Insta or subscribe to our newsletter!


